Thursday, February 21, 2013

Hard Work and No Play

Nothing new here, but I wanted to show what I've been working on since Sunday I didn't have anything on "Design Wall Monday."

I woke up Sunday morning and decided to go to Ikea. Well, it's only 4.5 hours away,what the heck! I was looking for something to store the large Studio dies and I had so many GO! dies that I was running our of storage space.

So my goal for the trip to Ikea was to look for shelving units 15" in depth or larger. I found a 15.75" depth bookcase that was slightly wider and much taller than the one that used to be in the room.  Plus, I would be able to get more items on this unit.  I decided my small/medium GO! dies would be happy here.  The dies are stored on two Ikea DVD storage trays.  I think they are made to be placed in a drawer unit but so far, the dies are still standing!
\

Then I got lucky and found pantry storage. I was really excited until I saw the prices; yikes! 18" shelves with rolling baskets which I wasn't happy with) was $380 and I would need two of them. So, I kept walking and got to the closet storage area. I found a closet unit that had a hanging rod for holding hangers. 
I went to sales representative and asked if I could just get all shelves instead. The depth of these shelves are 22+" and I can cram lots of stuff on them. And I did!


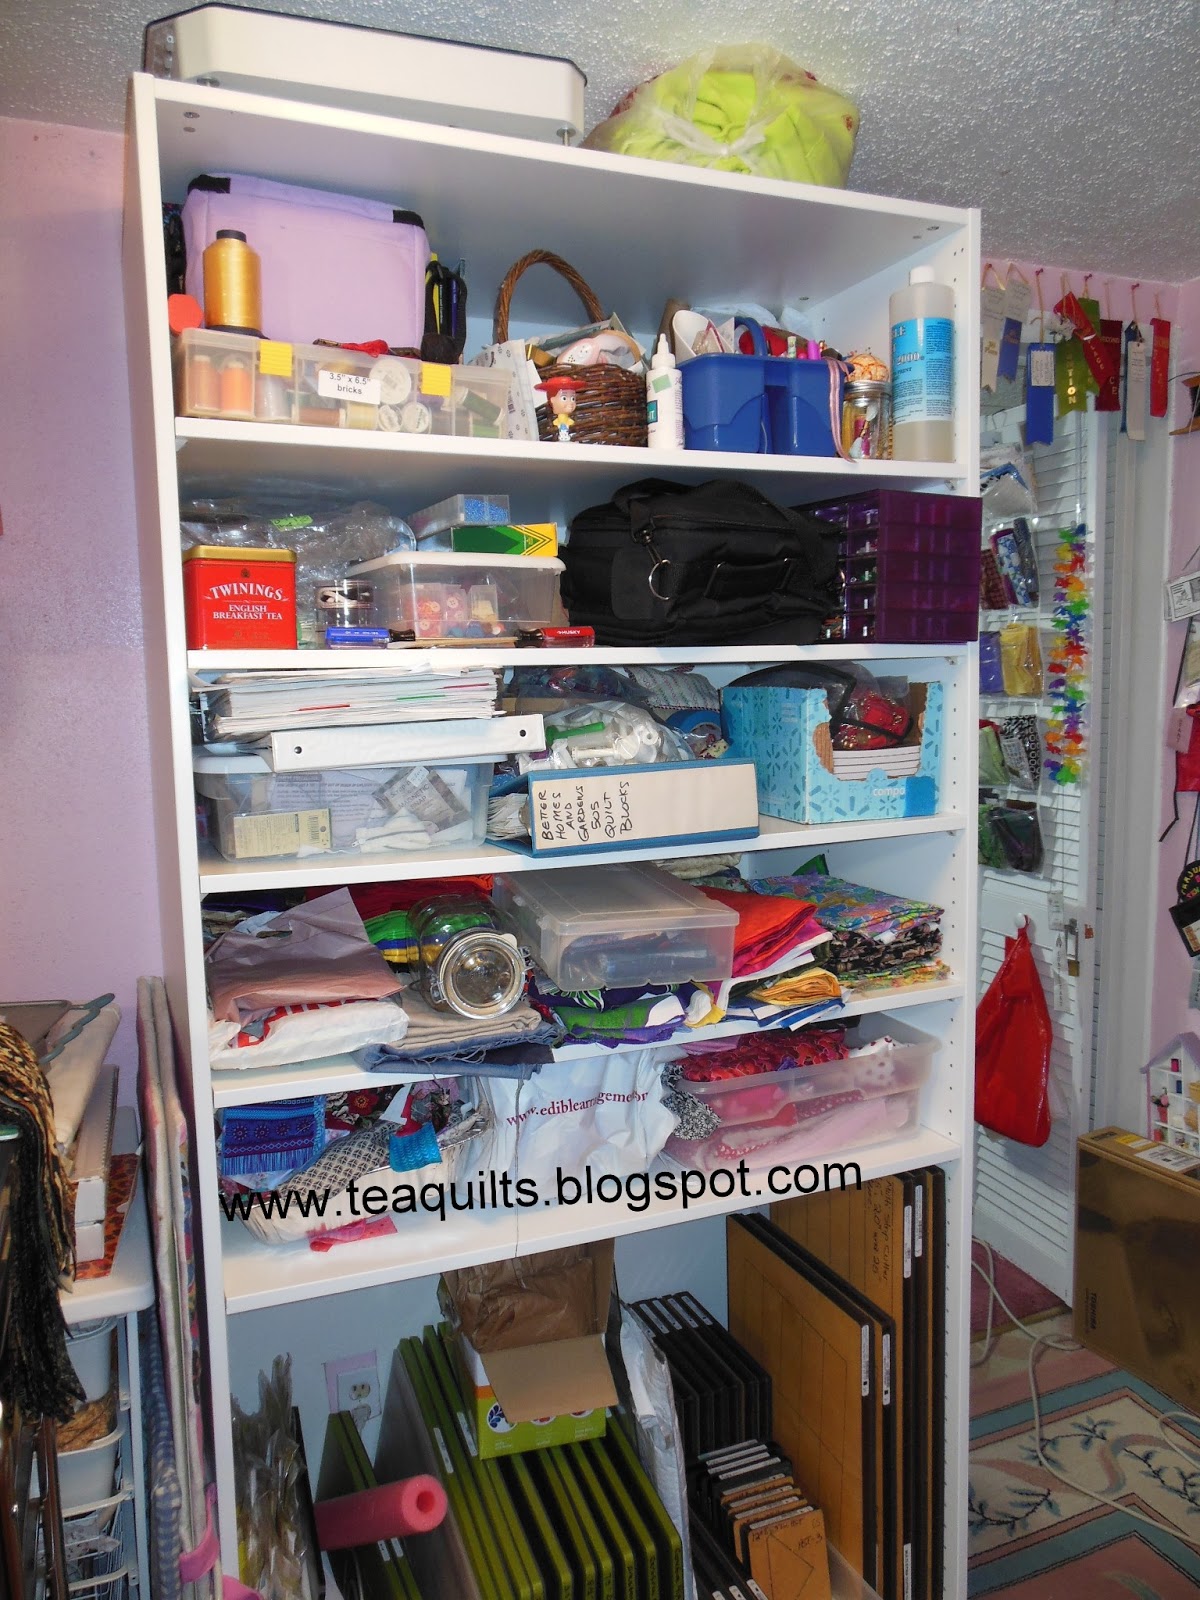
Here is close up photo of the Studio dies and large size GO! dies.  I save recycled paper to use with the dies if I need to adjust layers for perfect cuts.

I have my Studio cutter sitting on a kitchen counter I purchase years ago to make a large ironing surface. I made the surface and used it about 6 months that way.  I collected so much fabric that I starting storing fabric in large plastic bins on it.  When the studio came in December, I clean it off!  That's motivation.  My GO! cutter is hibernating in the basement, waiting for me to lecture or hold a stash busting workshop. I don't need it upstairs anyway because I can use my GO! dies on the Studio cutter with the adapter board.

I store my cut die pieces in these units.  I have one more in my sewing studio that also holds cut units.  Previously, the pieces were not in the trays long enough to justify labeling.  However, since I got the studio, and because it has it's own home, I die cut more now than ever.  I do plan to label these but haven't gotten around to it yet; been way too busy lately.

I realize I haven't gotten the items stored in the shelves properly and that will take some time. This small storage room holds a lot of stuff and it took me 3.5 days just to switch out two storage units. I couldn't leave the stuff out around the house while I got it all organized.

This makes me appreciate the crafters that makes organization look so simple.  Its hard for me because if my areas are clean, I'm not working!

Tea in MO
www.teaquilts.blogspot.com
www.teaquilts.com


-------------------------- Type-u-later, http://www.teaquilts.com

Monday, February 11, 2013

Design Wall Monday 2/11/13

Today is my friend, Debra, birthday.  Happy birthday Debra!

I didn't do too much this week quilt wise.  I did press, organize and label the tumbler units shown on my design wall last week.  I must have done a lot of reading or playing Spades and/or Sudoku.

On Thursday the Trace n Create template arrived in the mail and I got majorly distracted and made two iPad covers for my daughter and I.  We have covers with the keyboard attached, but it's kind of dirty and a little heavy when we don't need the keyboard. I made the Mickey one first using pattern instructions.  It's a little too much wiggle room for me.

On the second one on the inside I added a pocket to put a note or two and a stylus.  Also, because the first one was a tad too large, I modified how far in the elastic straps extended.  The red strip is extra strip on the inside; the blue is the original called for by the pattern.  It's so cool that it stands up this way by itself.  I used layers of heavy weight Pellon inside instead of the plastic insert sheets recommended.

I squared up about 70 HSTs; still have approximately 60 more to go.  I sometimes dread this step in quiltmaking. These units will go on my weed whacker quilt in the border.

To see more design walls, visit www.patchworktimes.com.
-------------------------- Type-u-later, http://www.teaquilts.com

Monday, February 4, 2013

Design Wall Monday 2/3/2013

Sorry this post starts with sad news but it will pick up with my progress later on.  I attended a retreat last weekend, January 25-27, and really had a great time.  
This is a picture of my friend and table mate, Karen. She had foot surgery and was on a one-legged scooter contraption because she couldn't apply pressure to the foot.  I assisted her the entire weekend, helping to get her equipment into the center, getting water, ice, food, and assisting however I could to make her stay enjoyable.  We are both members of the quilt guild sponsoring the retreat, but we also are members of a 6-member guild that meet in each other's home on a monthly basis. We function like a large guild in every aspect.  I dropped her off at home last Sunday and she was tired but so excited that she got out the house as she was getting bored.  It saddens me that she passed away last Tuesday due to a blood clot.  I've have had a mix emotions in the past week  I know that I will miss her dearly as she was the sweetest person I'd known, willing to assist others without expecting anything in return, even strangers.  I just wanted share with you a new angel that's watching over us and warn you that she's a perfectionist!

It's been two weeks since I posted and I do have a few projects that have moved along. We had an Asian inspired retreat and we had the option to make "Hu Hot Iron Caddy" This is a great pattern to make an iron caddy that doubles as an ironing surface as well. See that cord pocket on the outside; you can pack up and take the iron home while it's still hot.
 
Then I worked on a modified week whacker pattern. The top is pieced but I need to work on the border at some point. For this one, I used blue, green and red scraps. I have fabrics that have been in my stash from 1995.  They never go away!

 I also got an opportunity to sew these string blocks together.  I think this one may get a plain border; or I might change my mind as I haven't really decided yet.

For Superbowl Sunday I started out cleaning my studio. I haven't been able to sew in there for months.  After getting about 75% complete, I decided to reward myself and sew some stack blocks as they were already cut.  I have 21 blocks here. I may make about 40 of them so I need to cut down some 2.5" strips to continue.  I did piece some of the bricks to get rid of smaller scraps too.

Also in the photo above on Sunday, I sewed more tumbler units.  I'd previously sewed together 39 4-unit sections.  I laid them out as in photo below and realized I needed a few more with additional fabric choices.  Funny how if you have a large area to lay out the blocks/units the quilt top wants go be larger (okay they talk to me. LOL) So today I cut out more fabrics so I could make some new selections.  I now have 61 4-unit sections. I will save this project to work on Friday at my work group's craft night.

Please check Judy's site to see more design walls.

--------------------------
Type-u-later,

http://www.teaquilts.com