STRIP TEASE TUTORIAL
You will need:
36 jelly roll strips that are medium or dark in value. I used 2.5” strips that a friend cut from her stash so my quilt is scrappy, not from one line of fabric.
36 light jelly roll strips. You can use from different fabrics in your stash; however, I used the same fabric throughout. If you use one fabric, you will need 2-3/4 yards of fabric to cut your strips.
9.5” or larger square up ruler. I’m using Omnigrid but any brand will work as long as there is a diagonal line running from one corner to the other in at least one direction.
Step 1: Sew your strip set together as shown in the photo with an accurate ¼” seam (really important.) You should have 12 strip sets in each arrangement for a total of 24 strip sets. Press seams toward medium/dark prints.
Step 2: Take one of each type of strip set (like the two shown in step 1) and place right side together. If you have sewn accurate ¼” seams, the seams should lock in place with the outside edges of the strips meeting. Sew ¼” seam (keep it straight as you’ll be using this line later) on both long sides of the strips, making a tube.
Step 3: Using the photo as a reference, line your strip up as shown (I’ve cropped the strip so you can see better) with the diagonal line along the seam line (look up at the top). Trim this edge with your LEFT hand. Yes, I can here you…you need to learn to use your least dominate hand some times. Just try it.
Just showing the edge trimmed. Put the trimmed edge in a pile. It will be used later, but not right now.
Step 4: Slide the ruler to the left until the end that is closest to you is abutted next to the seam line. The edge of the ruler should stop right at the stitched line, NOT at the tip. In addition, the diagonal line is still on the sewn line at the top of this photo. (Sorry that I didn’t use contrasting thread so you could see the sewing line better.) Your ruler should be aligned exactly as shown in the photo, if not, do not cut. Adjust your ruler and then cut along the edge of your ruler. These are your blocks. Do not open them just yet, continue cutting.
Step 5: Pull the ruler down to the bottom and align the ruler as indicated above. Continue cutting across the width of the strip. Because of the variety of strip lengths, you may get 5 or 6 units from each strip set.
Step 6: I like to trim my triangle points while the block is flat. That way I only need to make one cut per corner instead of two. Align your ruler to stop at the stitching, keeping a line on the ruler parallel to the edge of the triangle. Trim the top. Repeat for all triangles.
Close up of the trimmed edge with ruler moved down slightly so you can see the technique.
Step 7: Press your seams open. (Please ignore the dog ear on this block; of course I got in a hurry trying to sew and take pictures.) I like to press seams open to reduce bulk as 8 fabrics will be meeting in the center point.
Step 8: Layout time! You need to decide what size quilt you will make. I recommend 12, 15 or 16 block layouts. Here are some possibilities with blocks laid out from 4 strip sets.
This layout uses 4 blocks from the same strip set. Notice that the Medium/dark prints creates a large diamond with opposite fabrics facing. Since you started with 12 sets of strips, the maximum number of Great Blocks you could make would be 12.
Here is a close up of just one block so you can get the idea.
This layout is very similar to the one above but it is a little different. Notice that in each Great Block the large diamond is now made with your light background fabric and that the 4 fabrics in the small diamond matches. Again, since you started with 12 sets of strips, the maximum number of Great Blocks you could make would be 12.
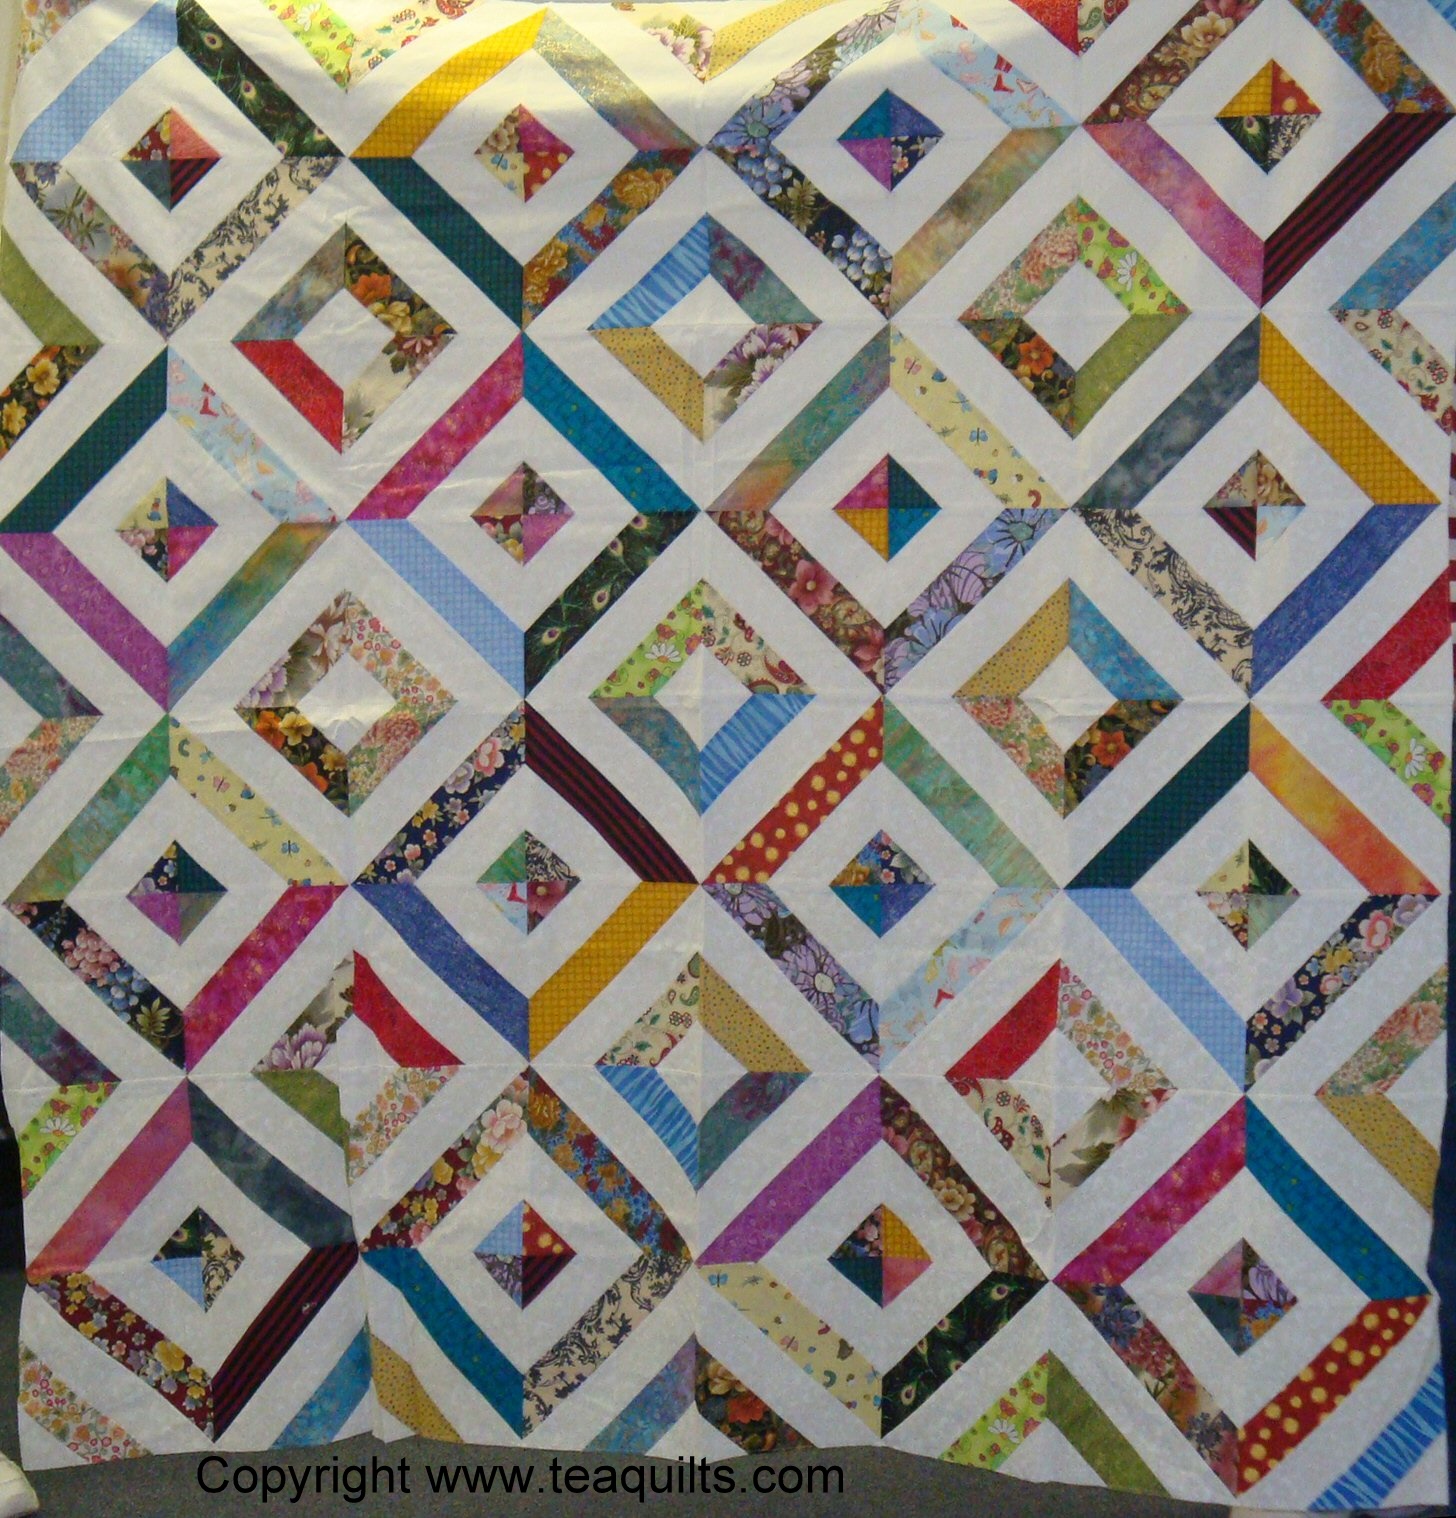
This is a scrappy layout where none of the fabrics in the Great block match. This is the layout that I chose. With this layout, you can opt to make a quilt with 15 or 16 blocks. But wait, I have another layout choice for you to ponder.
This zigzag layout is also very effective. It is laid out in scrap layout without any like fabrics touching. Your layout will be more varied when you use all the blocks (remember I only used blocks from 4 strip sets here.)
After you decide upon your chosen layout, lay out all your blocks, making sure of your arrangement. Now is the time to balance your fabrics in the layout.
Step 9: I recommend working on one Great Block at a time or marking your entire row with masking or painter’s tape. Use masking tape if you will be sewing your blocks right away; otherwise, use painter's tape.
I made my Great Blocks one at a time and returned it to the design wall after sewing. To make the Great Block, sew top two sections together and sew bottom two sections together. Press seams open.
Step 10: Sew the center seam to complete the Great Block. Press seam open. Repeat for all your Great Blocks.
Sew your Great Blocks into rows. Photo shows two rows of blocks sewn together.
Continue sewing the rows into a completed quilt top.
But what about the scraps I have leftover?
Now that the quilt top is completed, you have a lot of leftover units from the edges of the strips. They will look something like this depending upon if you consistently place the strips in the same position when you cut (light strips on outside on top OR dark strips on outside on top.) Press open the seams of all units.
I found a few layout possibilities with the remaining pieces. I laid them all out before sewing so I had a plan. Here are a few of the arrangements. There are subtle differences in each one.
Sew the blocks together, ignoring the outside edges as they will not match.
After you have sewn the blocks together, trim them to the largest size blocks you can, trimming off the selvages. Each block will be a different size.
Here is a photo of all blocks made from leftovers. I plan to use this in a scrap quilt with odd ball size blocks. However, you can use the blocks with additional fabric/s to make a back or in any other project, like totes, mug/table mats, etc. The goal here was to sew the leftover units into blocks.
This was a project for my scrap quilting club. To see more variations,
view these posts. You will have to scroll down as different participants brought various tops to the meetings for show-n-tell.
-------------------------- Type-u-later,

http://www.teaquilts.com


Great tutorial! I love the project with the leftovers too!
ReplyDeleteGreat tutorial. Something like this has been on my project list for quite a while. Love what you did with the leftovers.
ReplyDeleteLove your tutorial. Thanks!
ReplyDelete