Saturday, May 15, 2010

Half Square Triangles Tutorial Part 4

Squares Technique #2

With the previous technique in tutorial part 3, we made one HST from a square.  However, what if you need more than one?  One solution is to make the square large enough so that both halves can be sewn to be the correct size for your pattern. To do this you must ensure that the seam allowance you add is sufficient for two triangles. You must add 7/8” to the measurement in order to allow two 1/4 inch seams on the diagonal.   So, cut 2 squares 3-7/8" from two different fabrics.

Draw a line diagonally from corner to corner on one square.

Place right sides together and sew 1/4" on each side of drawn line.

Cut apart on drawn line.

Now you have two HSTs.

Pros:
1.  No waste HSTs as both can be used in the current project.
2.  Do not have to handle bias edges.

Cons:
1.  You will have to draw a diagonal line down the center and if you are making a lot of squares this can be tedious.  You could use the Angler 2 to sew seams or mark your sewing machine bed.
2.  Need to trim dog ears after sewing.

Solutions:
1.  If you need a lot of HSTs, try using paper piecing method, grid piecing method, or bias strips method.  These topics will be discussed in future tutorials.
2.  You still need to sew accurately for these to be the right size.  In the next totorial, I have a fix for this.

-------------------------- Type-u-later, Tea in MO http://www.teaquilts.com

Friday, May 14, 2010

Half Square Triangles Tutorial Part 3

Squares Technique #1

Did you know if you only need one HST there is a quick way to make it?  From two different fabrics, cut a square ½” larger than the finished size.  For this tutorial, my squares are 3.5".  Draw a line diagonally from corner to corner on the wrong side of one fabric. TIP: Since I don't pitch the trimmed edge, I draw another line 1/2" away from center.

Place squares right sides together and sew on the drawn lines.

Cut the square between the drawn lines.

You will have two HSTs.  The one on the left is the unit you need for your project.  The other smaller one goes into my "extra blocks/units" storage.  I'll square it to a size for a project when needed.

Pros:
1.  Can use pre-cut squares if you want a scrappy look.
2.  Don’t have to cut 7/8 measurement which requires more concentrated cutting.
3.  Do not have to handle bias edges
4.  No dog ears to trim after sewing.
5.  Great technique if you only need one HST.

Cons:
1. Will have to draw lines down the center of all squares
2.  Leaves you with a pair of triangles that are too small to be used for current pattern although you could make scrappy HSTs for a future project. If not, you are, in effect, throwing away a little under half the fabric you bought.
3.  The tip of the square often gets eaten by the feed dogs as you are trying to feed it into the machine.

Solutions:
1.  Try using the Angler 2 or marking your machine to eliminate the need to draw the diagonal lines.
2.  Chain piecing of units will help eliminate some tips being eaten by the hole in the plate.
3.  Cut the starting squares larger to eliminate tips being eaten (tomorrow's post.)

-------------------------- Type-u-later, Tea in MO http://www.teaquilts.com

Thursday, May 13, 2010

Half Square Triangles Tutorial Part 2

Bias Triangles from Strips

From two different fabrics cut a strip of fabric ½” larger than the finished size.  We are making 3" finished HSTs so strips are cut 3.5".

You will need an Omnigrid 96 ruler (or 96L depending upon size of completed half square) or Easy Angle I or II ruler.  I'm sure their are other HST rulers on the market.  Follow packaging instructions to cut your units.

Place fabric strips right sides together.  For the purposes of this demonstration, I'm using the Omnigrid 96 ruler.  Cut triangles, rotating the ruler as shown in three next photos.  Note how the tip of the ruler extends off the strips on the top.  Also, on the Omnigrid, the markings are for finished size of the HSTs.


Do not rearrange the units after cutting.  Pick them up and sew 1/4" seam putting the cut off tip end of the units under the needle, ending the seam along the tip end.  This will prevent the tip from being pushed into the hole on the plate when you start sewing the unit.

Press seam open.

Pros:
1.  Faster cutting method as you are not cutting squares then cutting those in half diagonally.
2.  Fabrics are cut right sides together so once cut they are ready for sewing.
3.  Saves fabric over using most methods to make HSTs because you start with 2.5" strips as opposed to 2-7/8" strips/squares.

Cons:
1.  Still working with bias edges which may stretch.
2.  Although you have eliminated one triangle dog ear, you still have one left.
3. Requires accurate 1/4" piecing for this method to be successful. Sometimes, a scant 1/4" is better.
4.  You need special ruler to cut shapes, sometimes more than one depending upon finished size needed.

Solutions:
1. Starch fabrics before cutting.
2. There are square techniques that will prevent handling bias edges. The first square technique will be posted in Part 3.

Let me know your thoughts if you have used this method.  I actually like this technique though I do not use it very much because I do not keep the ruler needed for cutting in my work space cutting area.  These rulers are stored at my main cutting area in another room.

--------------------------
Type-u-later,
Tea in MO
http://www.teaquilts.com

Wednesday, May 12, 2010

Half Square Triangles Tutorial Part 1

I've decided to start a series of tutorials. The first series will be half square triangles (HSTs). There are so many ways to make them, each with positive and negative results. I'm going to try to post on a daily basis a different technique that can be used to make them. Hopefully, the tutorials will continue with quarter square triangles, half-square rectangles, and flying geese.

For now, let's get back to HSTs.  I've made so many in my years of quilting, using a variety of techniques.  Some techniques are very fast, some require the purchase of additional supplies (rulers, triangle papers, software, etc.)  I'll describe a technique, giving the pros and cons of the method and if available, post possible solutions.  You may want to try each method with me to test your preferences to a particular technique.

For the purposes of the tutorial, all triangles will finish at 3".  Additionally, I usually press my seams open as opposed to the dark side.  Why?  Because when the HSTs intersect, like in a pinwheel block, the center can be very dense.  When quilting, these dense areas can cause needle breaks.  On long arm machines, the seams can be so high that the area cannot be stitched because the pressure foot will bump into the dense area and deflect; meaning no quilting in that area.

The first method is:

Bias Triangles (Traditional)

This is the traditional method for making HSTs.  This technique is used most often with patterns that has templates.  In order to avoid the templates, quilters today would measure one short side and then cut a square to that size, slicing it in half.  This was very easy to do with the invention of rotary cutting products.  So, from two different fabrics, cut a square 7/8” bigger than the finished size.  For this tutorial, cut 2 squares 3-7/8".
 

 Cut each square in half diagonally and swap triangles as shown.
 

Sew the bias edges back together to make half-square triangles.

Pros:
1.  No fabric waste as squares are cut to size needed for the block unit.
2.  Great technique to use when a small number of triangle squares are needed.
3.  If making a scrap quilt, you get the greatest variety of fabric combinations.

Cons:
1.  You will be working with bias edges which may stretch.
2.  Dog ears may get jammed in opening on throat plate.
3.  Requires accurate 1/4" piecing for this method to be successful.  Sometimes, a scant 1/4" is better.
4.  This method is the the most tedious as you must be careful when handling.
5.  Dog ears need trimming from seam before adding the unit to the quilt.

Solutions:
1.  Starch fabrics before cutting.
2.  There are a couple of square techniques that will prevent handling bias edges.  The first square technique will be posted in Part 3.
3.  If you need a lot of HSTs, choose another method.
--------------------------
Type-u-later,
Tea in MO
http://www.teaquilts.com

Monday, May 10, 2010

Design Wall Monday

Well, I didn't get a lot done this week as expected.  I had problems with my knee through Thursday night.  It's better now, but did prevent me from spending too much time at my sewing machine.  It didn't prevent me from purchasing a new car though.

I decided a little hand work may be in order.  I pieced one of the "Pushin' Up Spring" blocks and started the applique.  This one will be a sunflower when completed.  Maybe it will be a center piece or I just may get addicted and complete the entire quilt.  After piecing the blocks, each one has different applique flowers in their centers.  This is not my design (copyrighting the photo only), but a BOM available from Apple Blossom Quilts; click on newsletter and sign up.

I got tired of being a slug and called up one of my long arm friends.  On Saturday I quilted this Hidden Wells quilt top that's 96 square inches.  It's a UFO from a few years back.  I got it pieced and then just the thought of quilting that large of a quilt on my DSM scared me so I packed it away.  I'm glad it's quilted now.  The next step is to go through my UFO bins to find the binding fabric; maybe I'll sew it on this week and use this for my hand work.


That's it for me this week.  Pop over to Judy's site to see more design walls. 
--------------------------
Type-u-later,
Tea in MO
http://www.teaquilts.com

Wednesday, May 5, 2010

? New Quilt Related Item

I've been having too much fun.  I haven't sewn a lick; my interests are elsewhere.  After my road trip with my 1997 (yes, that's correct) Mercury Sable last month, I got to thinking (that's a really, really bad thing) "sure would be nice to have a SUV for road trips."  Well, Friday after work and a doctor's appointment, I just popped into my neighborhood dealer.  I plopped right into a Ford Taurus.  Oh, it's not a SUV huh?  I got a little side tracked.  To justify, it does have a super large trunk...
Boy was that nice, had all kinds of features and a nice ride.  I had a few things I didn't like, like when driving in reverse I couldn't determine the tail end of the car (even with the sensor and camera), the low front end which concerns me when it snows and speed bumps, but most importantly, the price.  This was out of my budget and the cost just ridiculous.

So I went back on Saturday and drove a Mercury Mariner.  You know, the vehicle I wanted to see in the first place.
After another talk with the finance manager, I decided this was the car for me.  I've been driving it for a couple of days and its beautiful!  I never thought I'd like driving in a vehicle that high off the ground, but I took no time adjusting to that.  I did have to upgrade to a 6 cylinder for driving performance, but other than that, the base vehicle has a great ride, nice and roomy interior, and some features already included in a package. 
--------------------------
Type-u-later,
Tea in MO
http://www.teaquilts.com

Monday, May 3, 2010

Design Wall Monday

I’ve have been busy and not all of it sewing related. I have been line dancing at work during lunch for 2 months. Last week I realized that my recreational center also holds line dancing on Mondays and Wednesdays. I attended both days; had a lot of fun and even convinced my daughter to go with me on Wednesday. Now, that means I didn’t progress on much sewing and when I did, I started experimenting. And if that isn’t bad enough, I’m having problems with one knee that is slightly swollen (probably from the increased 4 hours of dancing.) I’m working on that but let’s move on to the sewing this week.


I did manage to get the borders on the scrappy bento box and now have a flimsy. I still need to get back pieced and make the binding.  It's folded in half though so use your imagination.  It's about twin size.


The batik bento box is still on my design wall. However, I did sew two bottom rows together. I was able to sew these together without the use of sashing. I haven’t had time to decide what border fabric I’ll use.


 I now have 152 4-patches made of the 305 needed. As you can see in the photo, I have more strips sewn and additional fabrics pressed for cutting strips. It’s going faster than I expected and now need to pick my other fabrics for the quilt. The pattern my scrap quilting club is using is Cathedral Stars. We are breaking down the steps in hopes that by the end of the year we will all have tops made.


I have progressing nicely on the Mountain Top blocks. I now have 9 of these pieced. This is my chaining project. It’s amazing what a little extra sewing can produce.


I also made block 9 of the Quilted Fox’s BOM. We make the same block every month using different fabrics. We meet on the 3rd Saturdays. So, when I do that, I can add it to the setting I’ve already started which is different than what the quilt shop is recommending. I’ve decided I don’t want to make a quilt like the other 200 or so participants.  (Pardon the messy photo.  The block was pinned on point to a quilt I use as a curtain with other projects and documentation on it as well.)

I’ve been reading a lot of blogs and found some interesting project possibilities. I found this exploding pineapple block that just look like a fun technique. Of course I tried it. I’ll use this pattern when cutting scraps (you know, the box that is overflowing very badly) instead of cutting any miscellaneous size and storing them.

While in Paducah I purchased a few charm square packs. I found this pattern and thought it would be interesting as well. I used two charm squares to make the test blocks. I like this one too, so I’m setting up a kit with the pattern for sometime down the road.  You get two identical blocks from 2 charm squares, but you twist one to the left and the other to the right.  This is now set up as a kit.

If I’m participating, I need challenge quilts for May and June. Prior to this, I hadn’t started anything and had no particular interest in making anything. I started this triple irish chain using scrappy fabrics. I thought I’d use the floral fabric in the border which lead to the colors I chose. However, after trying to work with the miniature blocks, I gave up as they are so catty wompus (sp), the seams are not matching and I DID NOT like it. Sometimes you just got to throw something in the trash and this was it. What was in my head definitely did not formulate into the end result. I did restart another miniature quilt. The top is hidden under the floral fabric. I now need to get it quilted and then add the binding. This one is due in May. I still have to decide what, if anything, I’ll do for the challenge due next month. That one is for our guild’s 25th anniversary. I have an idea, just not motivated yet to follow through.


To see more design walls, go toe Patchwork Times.
--------------------------
Type-u-later,
Tea in MO
http://www.teaquilts.com

Monday, April 26, 2010

Design Wall Monday

I missed last Monday's post but made sure I caught up this week.  In my last post I told you about Block Party Sampler quilt I was working on.  It is now finished and the post is here.  I had a very successful trip to Pittsburg, KS and Joplin, MO.  I had access to post last week but was just too tired to do so.

On my design wall today is the Twist and Shout top (sorry, blogspot is turning my photo) from pattern by Lyn Brown.  It's really a neat way to get a quilt on point.  I'd seen this before in an old book at home with rail fence blocks but didn't want to cut up my blocks after sewing into a top so I forgot about it.  Now, why was it so easy to cut just plain ole squares?  I selected this pattern for the scrap quilting club's first project.

My scrap quilting club met Saturday and we swapped the Bento Box quarters.  My generally "bright" quilt turned into something not too bright and not too sedated.  I really like getting fabrics from swaps.  This photo is of the scrappy version.  My blocks are sewn with sashing in the middle.  I still have to add a border in the beige fabric before adding the red print as the final border.

And here is the Batiks only quarters we swapped.  My scrap quilting club is doing an awesome job?  Now I have to figure out how I want the second top pieced...

Again, another scrap quilting club project.  We are working on a major project over a few months.  We have until the end of May to make 305 3.5" 4-patches.  I started on mine yesterday and made 110 units that need to be pressed open.  I have a few more 2-piece sections ready for the next batch.  These were all made from 2" squares and 2" strips I had already cut that was stored in my studio.

I worked on some other projects but don't have photos of them, so that's all for now.  To see more design walls, go visit Patchwork Times.
--------------------------
Type-u-later,
Tea in MO
http://www.teaquilts.com

Saturday, April 24, 2010

Scrap Quilting Club - Twist and Shout

Here are the results from Scrap Quilting Club today.  We worked on Lyn Brown's Twist and Shout pattern.  Judi won the $15 gift certificate to Borders, Bindings and Squares; Sue won the 3 FQ bundle; and Mary Ann won one FQ.  You all are doing a great job!  I'm looking forward to seeing the bento box tops next month.

Sorry, Blogspot is turning this photo.
--------------------------
Type-u-later,
Tea in MO
http://www.teaquilts.com

Friday, April 23, 2010

Back Home

I've neglected posting in the past 1-1/2 weeks.  I must admit that my schedule got a little overwhelming even for my standards.  First I was busy prepping for my upcoming road trip to Pittsburg, KS and Joplin, MO.  Here is a photo of me leaving my home with the car packed.

What?  You can't see in the car?  Get ready to be shocked.  Here my car is stuff with all my quilts and stuff. This shot is of the back passenger side.  The quilts on the left are for my Sampler Quilts lecture.  The ones in the middle are the remaining of the quilts for the Scrap Quilts lecture.  That's not it, hold on...

This is the driver rear area.  The red case has my clothes and remaining quilt supplies I couldn't fit anywhere else.  The tan container is holding everything I need to teach the Exploding Star class.  The Target bag holds Snapware containers I gave as door prizes.  The blue you see is my sewing machine cloth cover (car way too full to get the machine carrier in there. 

But that's not all, my friend Sarah has to get in their with her luggage and sewing machine too.  I don't have that shot, but here is Sarah sewing at the workshop.

Oh, but wait, you haven't seen the trunk. I had about 40 quilts in there, bottle water, and very minimum car tools.  Not an inch to spare.  These are the remaining quilts for the Scrap Quilts lecture.

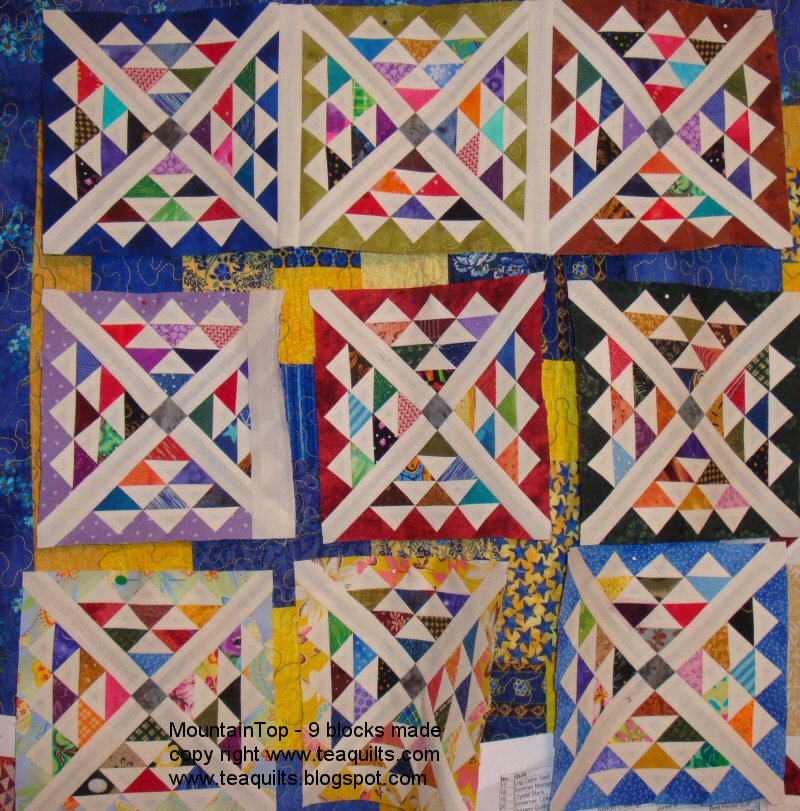
The following pictures are of the workshop at the Little Balkins Quilt Guild in Pittsburgh, KS.  I'm in the photo with some of the participants partially completed projects.

I also gave the Scrap Quilts lecture in Pittsburg before going to Joplin, MO to present two programs.  For the Town & Country Quilters, I gave the Scrap Quilts lecture.  I got to see some familiar faces as some members of this guild are also members of the Little Balkins guild.  Then, I gave the Sampler Quilts lecture at the Four Corners Quilt Guild in Joplin, MO.  I'm sure you can guess that members of the Town & Country guild are also members at this guild too.  I again saw familiar faces!

I must thank Mary LeClerc of Quilting in Oz for recommending me as a speaker to the Pittsburg guild.  I was then able to offer my services to the other guilds.  I went to Mary and Tom's home where Mary gave me the most amazing quilt show.  She does beautiful work and must be the fastest hand appliquer (sp) in the world!  She blogged about my visit here:
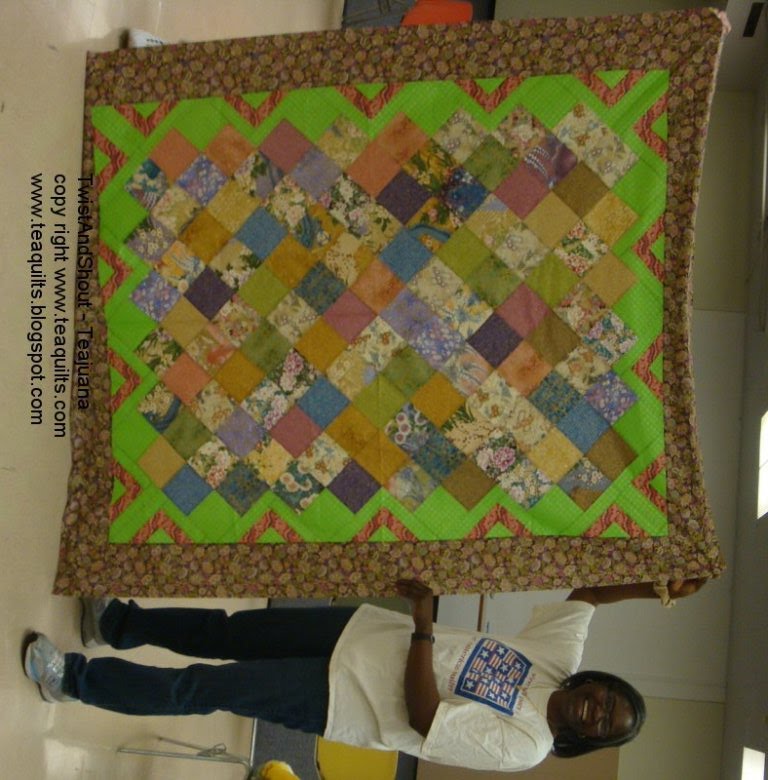
  Teajuana Mahone

Everyone I meet in Pittsburgh and Joplin were so nice.  I made so many friendships during my visit.  I have many contacts and have a few who are planning to come to the St. Louis area for a shop hop.  I'm going to try to convince them to make it a retreat at one of our facilities that's setup for quilters.  I'm looking forward to my next visit to these areas, even if I'm not hired to lecture.  Thanks Pittsburgh and Joplin for making me feel so welcome.

If that trip wasn't enough, I hopped in my car (after I cleaned it out) and headed to Paducah, KY for the big show.  It was a great show and I saw some familiar faces here too.  First, I ran into people in my guild.  Then a quilter in the guild where I taught at their retreat last June.  What was even funnier was seeing a group from the Pittsburg, KS area where I visited this past Monday.  I saw some beautiful quilts in Paducah, the food and weather was excellent, and the event was well attended.  I was glad I was so overwhelmed with my own schedule that I wasn't able to concetrate to leave TOO much money behind.  I left a little, but I left some things I would have liked.  I was so tired by then that I wasn't sure if I was being practical, so I just quilt.  I left the area around 4:15 and headed for home.  I'm glad I did as I had showers on the drive home.  I got home just as the rain was getting heavier.

Today was spent sleeping.  During my periods of alertness, I sorted and stored all the quilts.  I now need a vacation from my vacation.  Oh, but wait, I must go pack for Scrap Quilting Club tomorrow.  No rest in the schedule for now.  I've gotta go.
--------------------------
Type-u-later,
Tea in MO http://www.teaquilts.com