Monday, August 27, 2012

Design Wall Monday

I've had a busy and full week.  I'm in the middle of a bathroom remodel but still found some time to quilt.  I think I needed it for my sanity as a large portion of my home has been taken over with supplies, contractor (and some days, his workers), plastic drop clothes and a whole lot of dust.While being majorly inconvenienced with the remodel, I decided to sew to keep my mind occupied with other, more positive things.  I'm still working on my Christmas Scraps quilt.  I finished all the red blocks this week.  After that, I started sewing a huge chunk of them into pairs.  Now I'm sewing a few more into fours's. Because I didn't use as many scraps in this quilt as in previous scrap quilts, I will need a large floor area to lay out the blocks prior to sewing the rows together. That job will need to take place at work when our craft guild meets next Friday.

I got bored with the Christmas quilt and decided something new for Halloween would be fantastic.  I've always wanted to make Buggy Barn's If the Hat Fits quilt from the Frightfully Crazy booklet.  I actually plan to make two, one for me and the other for my daughter.  Here is the first set cut awaiting the sewing. I shuffled the pieces to show one of the blocks.  This is my favorite way to make pieced blocks that would normally be paper-pieced.  It's a very creative process they have created.


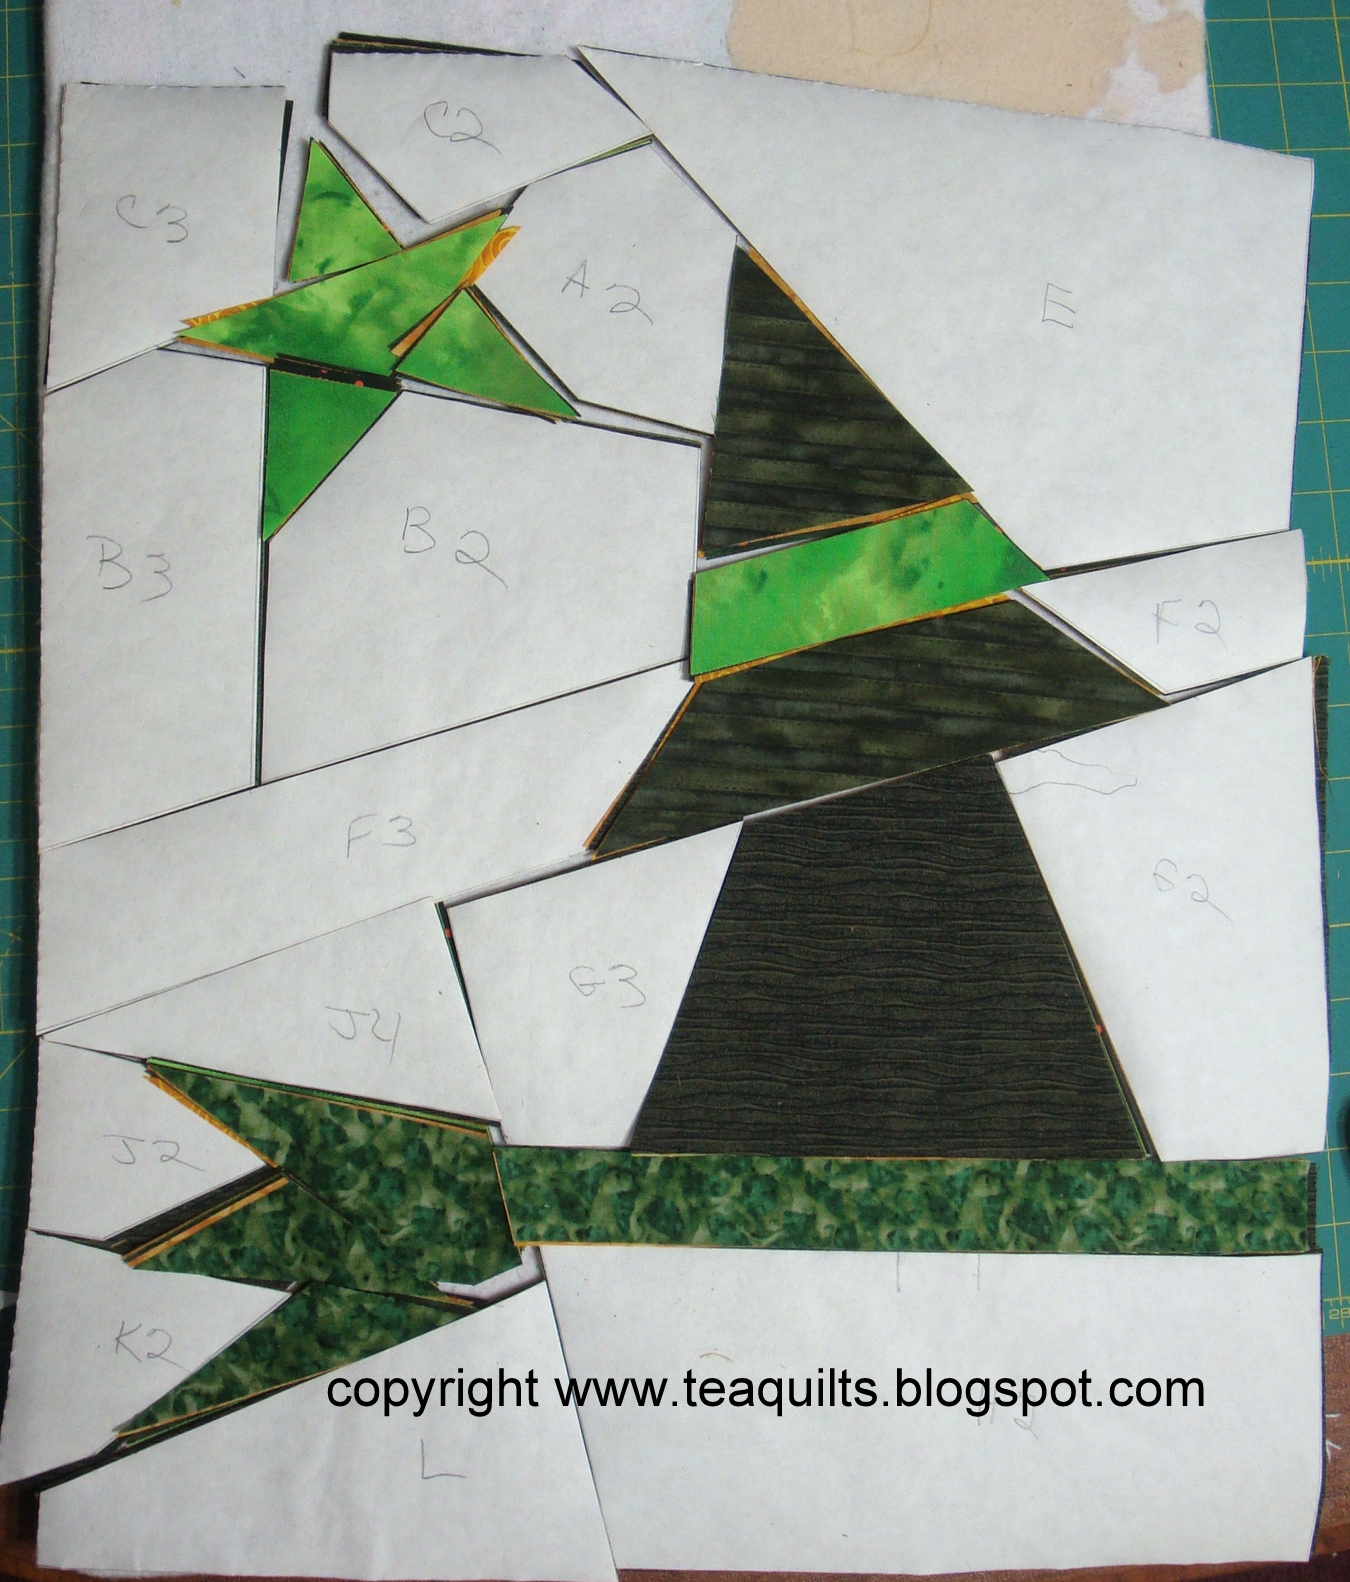
Even when you skip through the directions, you always have to come back to Step #1.  I started sewing the sections together and got 9 of 10 of them sewn.  You see, I skipped the first part of the directions as I new it would be tedious and I just wasn't in the mood.  I need to make the withes' leg/shoe units.  Now, whether I'm in the mood or not, now is the time. I have the legs all cut but need to go through my scraps to find more black fabrics for the shoes.

Well, I'm visually inspired so I sewed one set of legs and shoes together so I could make one block.  Too cute!  The legs and shoes dangles in the block.  After all the blocks are sewn, I'll square them all to the same size.  Jeez, what was I thinking, making two sets, I hate, hate, hate turning those legs. I will have to put this project up this week as I need to make a few quilt backs and cut batting from the roll.  It's time to start machine quilting some of those tops in my "ready for quilting" pile.

Hope you have a great Monday and to see more design walls, visit www.patchworktimes.com.
--------------------------
Type-u-later,

http://www.teaquilts.com

Friday, August 24, 2012

Bath Remodel Day 5, maybe 6 too

Yeah, now I see progress!  I have a tub.  It's all install inside the wall.  While on the subject of inside the wall, we had another problem.  Prior to purchasing this home, a bathroom was installed in the basement.  When the toilet was installed, they inserted the vent pipe upwards (as it should be) but didn't attach it to the main stack.  I guess they didn't want to rip out the wall to finish the job correctly. My family has looked at me strangely on occasion when I would walk into the house and say, "what's that smell?"  I have a very picky nose.  Well, I was validated yesterday and the problem was corrected today, prior to closing the wall.
 Picture showing shower head that was raised about seven inches.
 Had to remove the door today so we could install the remaining drywall.
 Here is where the new sink is going.  Yeah, no big hole in the wall anymore!
The downside of this day is that I now have sand dust all over my home and it will get worse before it gets better.  Tomorrow, day 6 will be another day of sanding.

Hopefully on Monday, Day 7, the painting will start.  Can you guess the new color of the bath?

-------------------------- Type-u-later, http://www.teaquilts.com

Thursday, August 23, 2012

Bath Remodel Days 2-4

Day 2-3 photos are shown.  Today is Day 4 and the only difference is that all the pink drywall has been replaced.  All the walls have been taped and some type of "putty" (sorry, don't know the correct term) has been put on top.  Some parts were done yesterday and they were sanded.  One more day of sanding is needed.  Hopefully after the sanding, the floor boards for the cast iron tube needs to be replaced.  We did find another problem though.  The pipe that emits toilet fumes from the bathroom in the basement is not connected to the stack.  We'll get that fixed tomorrow (of course for an additional fee) LOL.  I have no problem paying for the service as Mike, the contractor, is doing an excellent job!

This framing is for the medicine cabinet.  It's square with beveled edges.  I wanted to have a white frame around it but couldn't find one with it already included.  By the time we build a frame around it, I will not have room for the over the toilet shelf unit.
 Sink area is all closed up instead of open square as we are getting a pedestal sink.  Hopefully it will make the bathroom appear a little larger over having a vanity.
 So my husband and I had a disagreement on where the recessed box in the shower should be placed.  The contractor turned around and said, I'll just make two!  We are both happy.
New ceiling light has been installed over the bathtub/shower area.  Yeah, no more dark showers!

-------------------------- Type-u-later, http://www.teaquilts.com

Monday, August 20, 2012

Bath Remodel Day 1-not quilt related

I'm so excited to FINALLY get rid of the pink walls in the bathroom.  We are gutting the bathroom down to nothing but studs and starting over from scratch.  I was so sick of the pink walls that I purchased a blue/green shower curtain!  This bathroom hasn't had any work since 2006 when I painted it pink to cover imperfections in the drywall.  We did the tile at the same time, but everything else was as we purchased it.

Here are the before walls.  I took as much of the wall as I could get in the photos.  This room is only 5'x6' not including the tub so it's very, very tiny.

 I'm tired of the lights and medicine cabinet.  Not enough space to hide the clutter. I need more space to hold hair care products.
 My contractor couldn't start work until today, so I hired an electrician to update the electrical work in the bathroom to ground the outlets.  That left a hole in the wall.  The electrician offered to fix it but I declined as I was having it fixed three months later anyway.  See the hair care products on the sink, bad, bad, bad.
 So sick and tired of the white, old fashion 4" square tiles.  And you can see that the resurfaced tub is starting to turn blue.  So blue in fact that it started making me blue.
 Just plain old vinyl flooring.  I just plain old hate it!  You've got to go.


WARNING - Very nasty looking photos are following - nothing pretty here.

Well today arrived and so did my contractor.  I was so excited even though I knew I'd be without my bathroom for 7-9 days.  He first removed the sink, toilet and tub.  Repaired and updated some of the plumbing, especially since our cutoff valves to the sink and toilet decided to malfunction, leaking water all over the floor!
This is the tub wall.  It had a window that was covered when we tiles the bathroom in 1996.  Then about two years ago we replaced the siding outside the home and covered the other side of the window.  The window will now be completely removed.  This wall also is an outside wall so I guess the insulation will need to be replaced as well.  (Oh, that means I get to do more shopping, yeah!)

Now, he promises to return tomorrow and I'm praying that he does.  I don't think me and my husband could put this room back together.  I'll be back soon with Day 2 photos.
.

-------------------------- Type-u-later, http://www.teaquilts.com

Design Wall Monday

A few weeks ago I pulled out a UFO I started in October 2008.  I had about 100 of 400 blocks made.  I put those block on the wall to do a little playing for motivation to get the other 300 blocks completed.  I like this setting but will not do this one as I want to start another project similar to this one with this setting.
 This is the setting I planned to make, just straight rows.  I've always wanted this style of quilt on my bed.  I love the alternating red and green squares.
 Yeah!  I got all the blocks made.  I pressed the green ones and started sewing them into pairs.
 I finished my Rouge River log cabin quilt top. It's now in the to-be-quilted pile.
 Here is a mug rug I made.  The loop can hang the mat when storing or it can used as a cup marker by wrapping around the handle.  This is my test mug and I plan to make more for Christmas gifts.

-------------------------- Type-u-later, http://www.teaquilts.com

Monday, August 13, 2012

Design Wall Monday

I finished piecing the top of my Rouge River Log Cabin today.  I don't have a photo to upload as I forgot to take one.

I started working on this quilt for a family member. The fabrics in the centers are his favorite things:  computer/technology, work tools, and tennis shoes.  I have a couple more rows to add before it's completed. It's a little more complicated than it looks with off setting the blocks but I love the "rail fence" look.

-------------------------- Type-u-later, http://www.teaquilts.com

Sunday, August 12, 2012

Scrap Quilting Club

These photos are from scrap quilting club projects shown at the July meeting.  I didn't finishing with all the documentation but decided to upload them anyway.  July's project was to make at least three mug rugs using scraps.  Although the blocks were not due until this month, many of them had them completed early.


-------------------------- Type-u-later, http://www.teaquilts.com